Learning to Illustrate/Paint with Autodesk Sketcbook (How To)

I tried learning to draw as a kid but did not get very far. I intend to revisit this interest of mine, with a fairly simple/adhoc plan:
- Get an ipad with a pencil.
- Get an illustration tool and learn to use it. So far, ( Autodesk Sketchbook ) has been fantastic. Its free too.
- Draw for 1 - 2 hours biweekly or monthly. This will mostly be around following youtube videos on the subject ( active learning ).
- At some point (once there is sufficient mastery of the tools), explore original drawings?
Why Draw?
Why? Well, it's hobby that is both relaxing and includes my interest in digital art.
The above is an excerpt from an article on how art can reduce stress .
Attempt #1 - Landscape Illustration
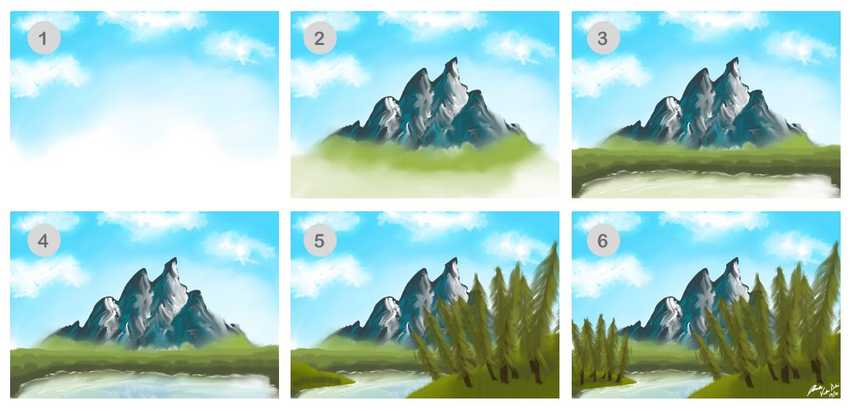
For a first attempt, I followed this tutorial on drawing a landscape with a mountain, river, small hills and some trees. In all, it took about an 1 hour and 20 minutes to complete. The main challenges where around getting used to SketchBook, brush types and configurations etc. Most parts of the drawing are done in layers - which given the illusion of things being above or beneath.
I have broken the entire process into 6 rough steps:
-
1. Sky: Starts with arc lines of varied increasing shades from middle to top (light blue arcs, from middle to darker blue at top). These lines are then blended together using a blending brush. Next, little smudges of white clouds are added and blended.
-
2. Mountain: Starts with a dark gray mountain outline which is then filled. Next, light and dark shades are used to color sides of the mountain to indicate sun light direction.
-
3. Treeline. Green blobs at base of mountain done using lines of increasing shades light green to darker green plus some blending.
-
4. River. Some blue, some white outline to define the river shore, and a reflection of the mountain. This reflection is an inverted, transformed copy of the mountain in step 2.
-
5. Small Hills with Trees. Two small hills are drawn on the left and right and trees added. Trees are duplicated, and transformed to create multiple trees.
-
6. More Trees and a Signature. Yes, it's my first Sketchbook drawing, but I guess all "artists" should sign their work :).
Will I find time to draw as often as I want? I dont know. But I'll sure post as I find time.
Attempt #2 - Flower Painting.
For a second attempt, I followed this tutorial on drawing/painting a flower. In all, it took about an 1 hour and 30 minutes to complete. I am still getting used to the tools/brushes, how to lock/unlock layer transparencies, blending etc. I reckon I should complete a couple more drawings tutorial style to get a hang of when to use what!

Attempt #3 - Winter Landscape.
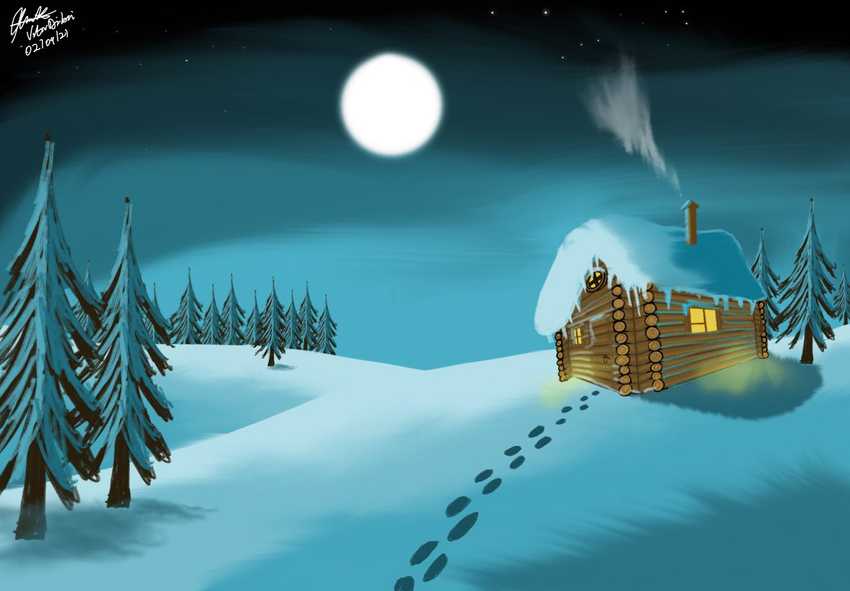
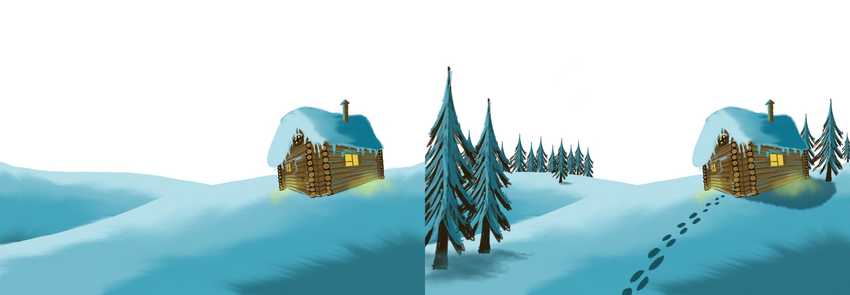
For a third attempt, I followed this tutorial on painting a winter landscape. This one was a bit involved beginning with illustrating the cabin on the right - logs, windows, lighting, snow, chimney. In all, it took about an 2 hours and 30 minutes to complete. Next, adding and blending the snowy hills behind was fairly straightforward. The same tree technique used in attempt #1 is applied to the winter trees again here.
Attempt #4 - City Scape Landscape.
After what has been a hiatus (I've been working on improving handtrack.js!), I tried a city scape. I did this piece in a bit of a rush so it's not as polished as could be. As usual, I followed a tutorial from the amazing Bilderrausch channel. I completed this in a little under an hour.

P.S. If you have thoughts on other good tutorials or just want to share your thoughts on drawing, feel free to drop a tweet. A friend already suggested Bob Ross painting videos which I'll review once I get a good hang of Sketchbook.
 Introducing Peacasso: A UI Interface for Generating AI Art with Latent Diffusion Models (Stable Diffusion)
 ART + AI — Generating African Masks using (Tensorflow and TPUs)
 Hello World VR Application with the Oculus Quest 2 and Unity
 Designing Anomagram
 Signature Image Cleaning with Tensorflow 2.0 - TF.Data and Autoencoders