How to Render Jupyter Notebooks in Your Web (React) App
Jupyter notebooks are great for experimentation, teaching and learning. One way to make them even more powerful/impactful (especially for teaching) is to make your notebook available as a web page that can be viewed without the need for a specific python (or other language) environment (e.g., Colab, Kaggle, or Binder).
I have written a few pedagogical notebooks and I wanted to explore ways to organize/integrate them into a web application (Gatsby) where they can be browsed easily and then launched if needed. My key requirements for this project included:
- Support a workflow where I can update/maintain the notebook directly and those changes are automatically synced with my web application;
- Style the notebook to fit the web application design language and support custom behaviours (e.g., click events).
This post discusses my process in addressing these requirements and covers the following:
- Pros and cons of two high level approaches to rendering Jupyter Notebooks in your web application
- The approach I used: Create a script to convert notebooks to
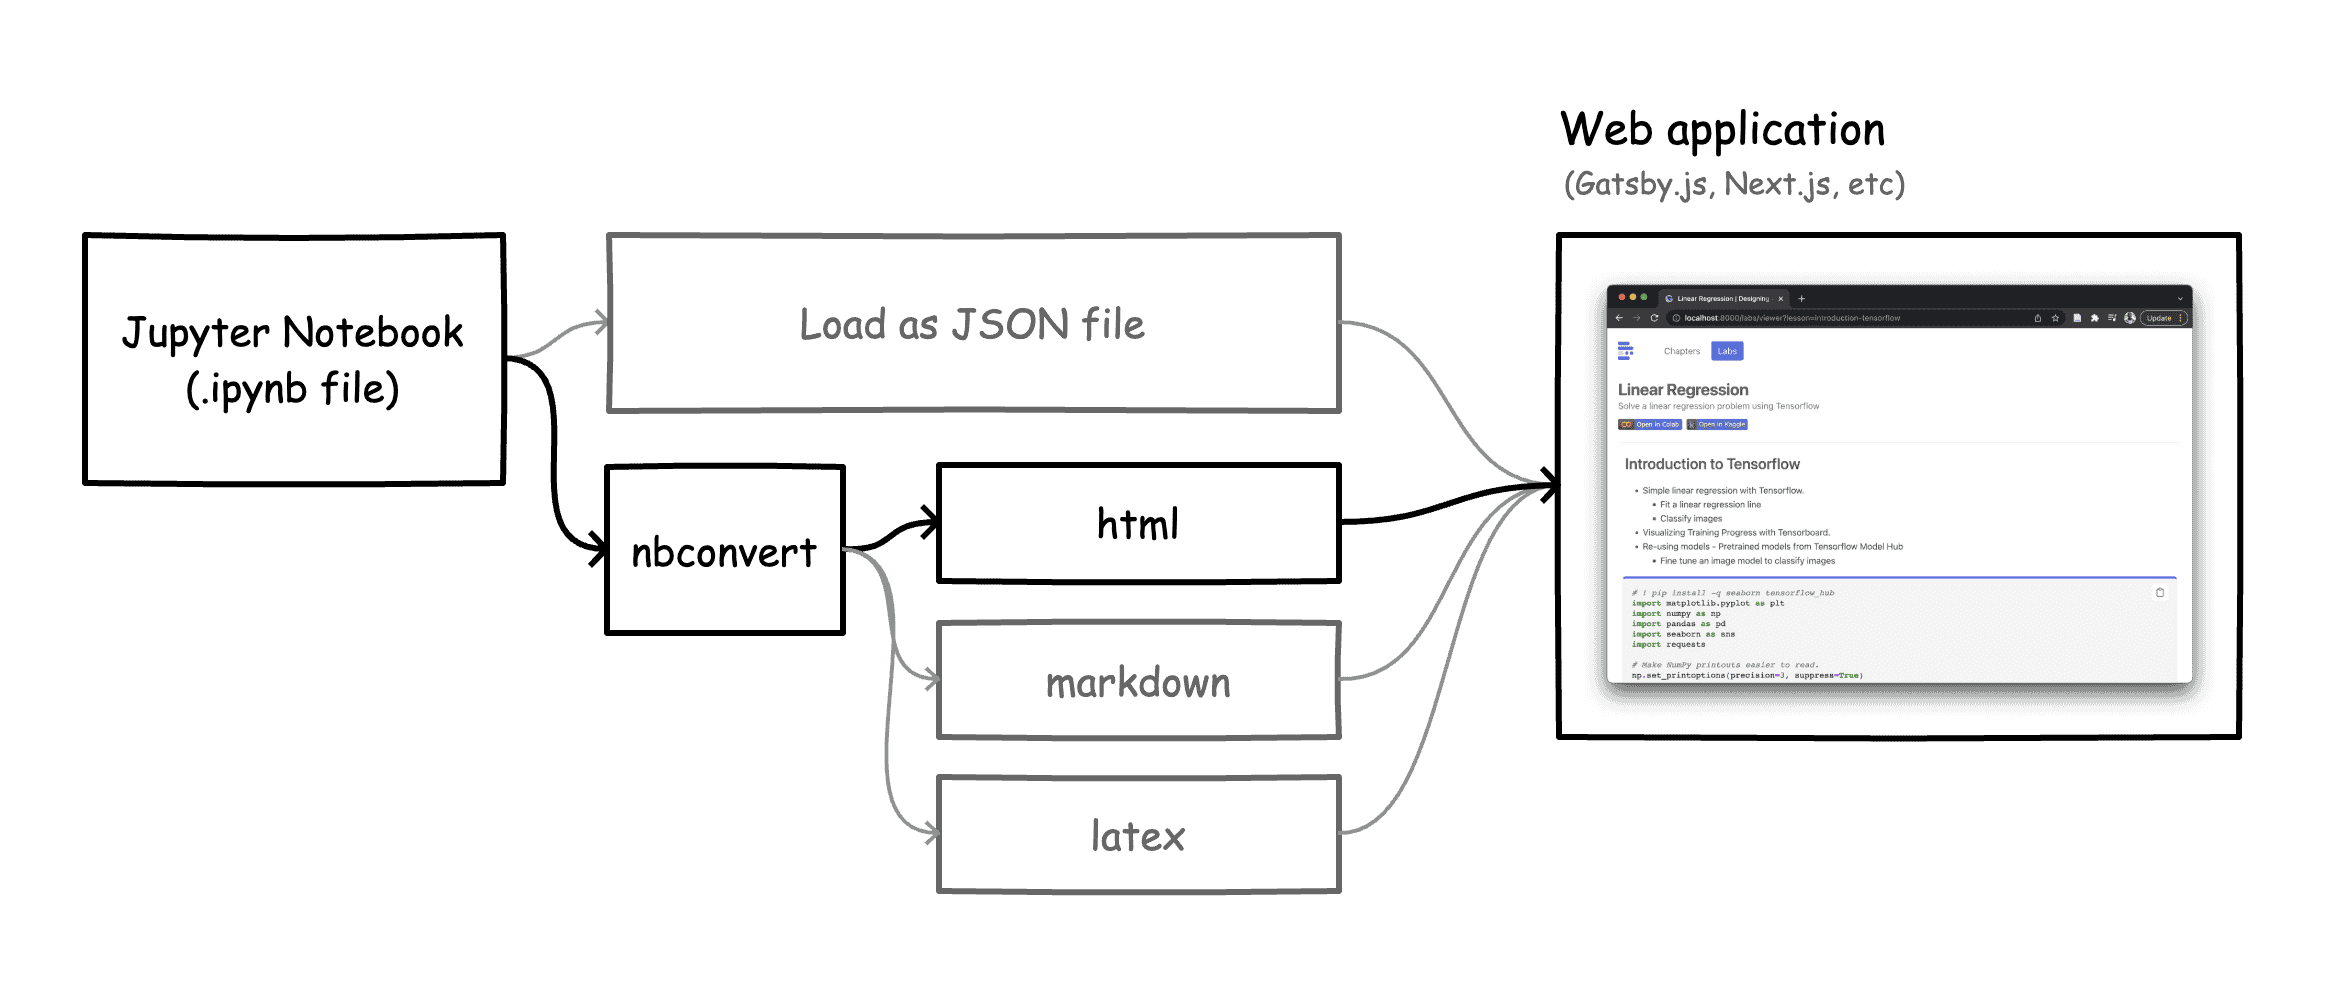
htmlusingnbconvert, apply custom styling via css, add custom javascript behaviors, import and view thehtmlin agatsbyweb app usingiframes. As you will see, this is not the only approach, but it addresses my requirements above.

Example Jupyter notebook rendered on the web. P.S. Hinting at an experiment page for organizing some notebooks I have written on the web.
Related Tools
The idea of Jupyter notebooks on the web is not new. If you are not particular about controlling the details of the notebook, there are several tools that also address the task of generating web pages from Jupyter Notebooks. Some of these tools focus on just parsing Jupyter Notebooks (nbconvert), some focus on generation of documentation for libraries (docusaurus, mkdocs, material for mkdocs) and others are more full featured writing tools (blogs, scientific publishing) with support for multiple formats (fastpages, quarto).
Fast Pages
The fastpages[^3] package from the incredible folks at fast.ai lets you create an entire blog completely from Jupyter notebooks.
MK Docs and Material for MKDocs
Material for MKDocs takes this to the next level, first by providing an ecosyste of plugins, UI components, search etc.
Quarto
Quarto is a full featured open-source scientific and technical publishing system
- Author using Jupyter notebooks or with plain text markdown in your favorite editor.
- Create dynamic content with Python, R, Julia, and Observable.
- Publish reproducible, production quality articles, presentations, websites, blogs, and books in HTML, PDF, MS Word, ePub, and more.
- Share knowledge and insights organization-wide by publishing to Posit Connect, Confluence, or other publishing systems.
- Write using Pandoc markdown, including equations, citations, crossrefs, figure panels, callouts, advanced layout, and more.
What's in a Jupyter Notebook?
If you have opened a Jupyter notebook file (.ipynb file extension) in a text editor, what you see is a json document. This json content (which we will refer to as jupyter json) is rendered in cells and made interactive in the jupyter notebook interface. The example below is the json for a jupyter notebook with a single code cell: print('Hello World').
{"cells": [{"cell_type": "code","execution_count": null,"metadata": {},"outputs": [],"source": ["print(\"Hello World\")"]}],"metadata": {"language_info": {"name": "python"}},"nbformat": 4,"nbformat_minor": 5}
Now that we know what's in an .ipynb file, the question is - how do we go from json to beautiful cells of text, formatted code and images that display nicely in the browser? There are two high level approaches - i.) directly parsing/rendering jupyter json and ii.) using nbconvert to convert jupyter json to other formats such as html, restructured text, markdown, latex, pdf etc.
Parsing and Rendering Jupyter Notebooks
Parse and Render Your Own Jupyter JSON
In theory, you can load a notebook file, parse the content as json and write your own React component to render its content (see pseudocode snippet below).
const notebook_url = "test.ipynb";fetch(notebook_url) // fetch the notebook.then((response) => response.json()).then((data) => {// iterate over the cells, display source and outputdata.cells.map((cell) => {return (<><div>{cell.source}</div><div>{cell.output}</div></>);});});
While this approach offers the most control, it is also the most effortful as you will need to fully understand the Jupyter json structure and also implement layout/styling (e.g., how to style code cells, output cells, parse & render markdown cells, code syntax highlighting, table formatting where applicable etc.). It is a lot of work! And perhaps unnecessary work.
See this open source project which attempts to implement a React component that loads a Jupyter notebook via url, parses and renders its content.
It turns out that you can leverage layout/design decisions made by others who have spent time designing and developing Jupyter Notebooks. Hello nbconvert!
Parse Jupyter JSON with nbconvert
pip install nbconvert
nbconvert is a Python package that converts Jupyter Notebooks to multiple target formats including HTML, Markdown, LaTeX and ReStructuredText . Nbconvert provides default templates that govern the visual layout and style for each of these target formats. Results from nbconvert (which are already styled) are easier to include in your web application.
jupyter nbconvert --to html tensorflow.ipynb --template html
I initially explored the markdown format as my Gatsby application already had a blog section based on remarkdown (a format that that allows writing JSX inside markdown files). However, I found that the markdown format generated by nbconvert were not immediately compatible with Gatsby causing parse errors. In addition, it can be challenging to visually style markdown and add interactive click behaviors. In theory, you can write a custom template to govern the generation of markdown files using the nbconvert templating system; however, again this route felt like unnecessary work.
I ended up using the following html approach:
- Use
nbconvertto convert the notebook tohtml - Wrote some custom
cssstyling to format cells and output; add customhtmlandjsbehaviors. - Wrote a script in
gastsby-node.jsto automatically convert all notebooks in a directory tohtmland copy to the Gatsby static folder - Wrote a React component to load these html files and render them in iframes.
Given that I have some experience with css and html, I found it easier to focus my effort on writing css rules to style/control the notebook.
Styling nbconvert HTML Output
Under the hood, nbconvert uses Jinja templates (.j2 file extensions) to determine how to render a notebook. If you need some custom preprocessing or a specific output format for your notebook, creating a new template file (which can inherit from any of the supported base templates) is the way to go.
Nbconvert Templates
To create a custom template, you will need to do the following:
- Find the
templatesdirectory for nbconvert. You can runjupyter --pathsto see directories that jupyter will scan to discover your templates. Learn more here. Note that you might find your templates directory in a different location depending on your system. In this case, you can add a symbolic link that maps your templates directory to a path jupyter is scanning. - Create a new folder in the nbconvert
templatesdirectory for your template. In my case, I copied thelabtemplate, renamed it todml - Update
dml/static/index.cssanddml/static/theme-xx.cssas needed. The goal is to identify the css classes linked to the layout elements you want to modify and update them in thecssfiles. See thenbconverttemplate documentation here for more details.
Some of the css changes I made were to hide numbering in cells, add custom borders to code cells (.jp-InputArea-editor class), increase font-size, add copy code button to code cell (see section below) etc.
Once you are done styling, you can then run nbconvert using your custom template.
jupyter nbconvert --to html tensorflow.ipynb --template dml
Once your notebooks are converted to html, you can create at React component that takes a url and renders an iframe with the html.
import * as React from "react";const IFrame = ({ url }) => {const [iFrameLoaded, setIFrameLoaded] = React.useState(false);const divBoxRef = React.useRef(null);const resizeIframe = (iframe) => {// .. resize iFrame container divBoxRef as needed.};return (<div ref={divBoxRef} className=" relative text-gray-600">{!iFrameLoaded && (<span className="inline-block">loading notebook ...</span>)}<iframeonLoad={(e) => {setIFrameLoaded(true);resizeIframe(e.target);}}title="static_html"src={url}></iframe></div>);};export default IFrame;
Example view where a component loads and displays multiple converted notebooks.
Note: There may be some limitations to the content of interactive notebook cells e.g., some python widgets such as visualization widgets may not render properly.
Adding Javascript Events
You can modify the base jinja templates to add new html content and enable interaction behaviors with javascript. For example, I want to create a button that allows users to copy the contents of a code cell to the clipboard.
To do this, you can add a button to the base.html.j2 jinja template in the dml directory. The snippet below adds a button all code cells.
<divclass="jp-CodeMirrorEditor jp-Editor jp-InputArea-editor"data-type="inline"><div role="button" class="copyButton"><svgxmlns="http://www.w3.org/2000/svg"class="copySvg"fill="none"viewBox="0 0 24 24"stroke="currentColor"stroke-width="2"><pathstrokeLinecap="round"strokeLinejoin="round"d="M9 5H7a2 2 0 00-2 2v12a2 2 0 002 2h10a2 2 0 002-2V7a2 2 0 00-2-2h-2M9 5a2 2 0 002 2h2a2 2 0 002-2M9 5a2 2 0 012-2h2a2 2 0 012 2"/></svg></div><div class="CodeMirror cm-s-jupyter">{{ cell.source | highlight_code(metadata=cell.metadata) }}</div></div>
Next, you can add javascript to your template to implement a click event listener for all copy buttons. The snippet below adds a click event listener that copies the content of the code cell to the clipboard on each click using the html5 navigator.clipboard api.
<script type="text/javascript">document.addEventListener("DOMContentLoaded", function () {var elements = document.getElementsByClassName("copyButton");Array.from(elements).forEach(function (element) {element.addEventListener("click", (e) => {navigator.clipboard.writeText(element.parentNode.textContent.trim()).then(function () {console.log("Async: Copying to clipboard was successful!");var notificationBox = document.getElementById("notificationBox");notificationBox.classList.remove("hidden");setTimeout(function () {notificationBox.classList.add("hidden");}, 2500);},function (err) {console.error("Async: Could not copy text: ", err);});});});});</script>
Note the copy button that is now added to the top right of all code cells
Automate the Conversion Process
I added the following snippet to my gastsby-node.js file. Note that code in gastsby-node.js is executed once in the process of building your site. Alternatively, you can write a similar script in your language of choice that achieves the same goal.
const fs = require("fs");const { spawn } = require("child_process");const notebooksFolder = "../notebooks";fs.readdir(notebooksFolder, (err, files) => {files.forEach((file) => {if (file.split(".")[1] === "ipynb") {console.log("convertign file -> ", file);const convert = spawn("jupyter", ["nbconvert","--output-dir","static/notebooks","--to","html","../notebooks/" + file,"--template","dml",]);}});});
The snippet above scans the notebooks folder and converts all notebooks to html in the static/notebooks folder.
Conclusions
Based on my experience building out the approach above, here are some general recommendations for rendering notebooks on the web.
-
If you want low level customization (e.g.. complete control over content, formatting, transformation, etc) - you can load, parse and render your ipynb files directly. Note this is route is the most effortful.
-
If you would a relatively fast method to render notebooks on the web that integrates well into your existing application and stack , use nbconvert to generate styled html (or other format) and customize as discussed in this post.
-
If you just want notebooks on the web without any customization .. use existing tools like fast pages.
This post discussed several approaches to parsing and rendering Jupyter notebooks. I hope that this post has helped you to understand the Jupyter Notebook format, how to convert it other formats using nbconvert and how to style and integrate it into your web application.
Have you worked on something similar? Or trying out some other approach? Reach out on twitter!
And yes, I look forward to sharing the "organized" collection of notebooks once I have made some more progress.
References
[^1]: MkDocs: MkDocs is a fast, simple and downright gorgeous static site generator that's geared towards building project documentation https://www.mkdocs.org/ [^2]: mkdocs-jupyter: Use Jupyter Notebooks in mkdocs https://github.com/danielfrg/mkdocs-jupyter [^3]: Fastpages: An easy to use blogging platform with extra features for Jupyter Notebooks. https://fastpages.fast.ai/ [^4]: Quartois an open-source scientific and technical publishing system built on Pandoc https://quarto.org/
 Why I moved my personal website to Gatsby.js + Github
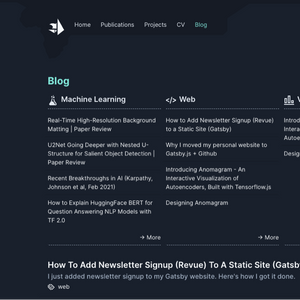 How to Add Newsletter Signup (Revue) to a Static Site (Gatsby)
 Implementing Dark Mode in Gatsby + Tailwind while Avoiding Flash of Unstyled Content (FOUC)
 How to Render Blender 3D Models in React with React Three Fiber
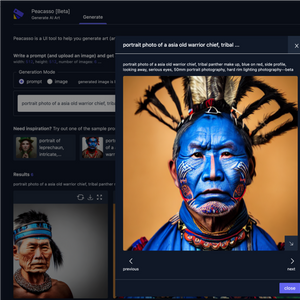 Introducing Peacasso: A UI Interface for Generating AI Art with Latent Diffusion Models (Stable Diffusion)
 How to Build a Similar Posts Feature for Your Gatsby (JAMSTACK) Website using Machine Learning (Document Similarity)
 Hello World VR Application with the Oculus Quest 2 and Unity